|
|


Emergency Notification Systems
 This section of our technical library presents information and documentation relating to Emergency Notification Systems and Disaster Recovery Applications.
If a severe snow storm hits your area, your community can be notified of school closings or event cancellations. Should an emergency arise in your community, our emergency broadcast phone service can deliver large volumes of phone messages quickly using thousands of digital and analog phone lines simultaneously. If a dangerous chemical spill occurs in your community, you can target specific areas to call. In the event of a blizzard, wild fire or devastating flood, your community can be notified quickly given specific instructions if an evacuation is required using our emergency broadcasting service.
This section of our technical library presents information and documentation relating to Emergency Notification Systems and Disaster Recovery Applications.
If a severe snow storm hits your area, your community can be notified of school closings or event cancellations. Should an emergency arise in your community, our emergency broadcast phone service can deliver large volumes of phone messages quickly using thousands of digital and analog phone lines simultaneously. If a dangerous chemical spill occurs in your community, you can target specific areas to call. In the event of a blizzard, wild fire or devastating flood, your community can be notified quickly given specific instructions if an evacuation is required using our emergency broadcasting service.
DSC Autonomous Call Center Acknowledgement Client
Flow Description
Following is a quick summary of the purpose, configuration and flow of the Autonomous Call Center Acknowledgement Client (Page 1) (AcsACK).
Purpose
AcsACK has been created to facilitate a manual acknowledgement to the automated emergency or non-emergency phone number and wave distribution server (DscACS) at a remote location (e.g., here at DSC).
It is designed to minimize the risk of failure in the transmission and execution of a sound blast distribution, especially for emergency requests. It is used to verify and / or facilitate:
- The availability and readiness of a distribution client (Associate.)
- The successful receipt of phone lists and wave files.
- The success or failure of a run.
- The optional upload of unprocessed numbers in case of partial failure.
- The upload of the report statistics for the run.
- The sequential naming convention of uploaded files (proposed – see Appendix.)
Configuration
DscACS runs at as a service at a site remote to the AcsACK client, so an entry must be made in the Windows “Services” file (generally found in “c:\\Windows\\System32\\drivers\etc,)” and the location of the server (Host name) needs be indicated. A “Configure…” menu option is provided where the Host information can be stored, and a reminder regarding the Services entry (Figure 0.)
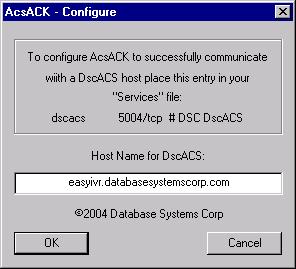
Figure 0
Flow
AcsACK is to be manually invoked by the Associate whenever an ftp document arrives at a directory pre-designated for upload “alerts.” The document will contain information regarding the impending upload, similar to the following:
EMERGENCY!
Uploading data for campaign run: 2306
Number of phone records to upload: 32000 (these may come in multiple files.)
The following wave files will also be uploaded:
2306.wav
Please use the AcsACK client to respond to this request for upload.
For further information, contact DSC at (602)265-5968.
Thank you.
Screen 1
When AcsACK is invoked, the user is presented with the first screen (Figure 2,) from which the readiness and availability to process this upload may be indicated.
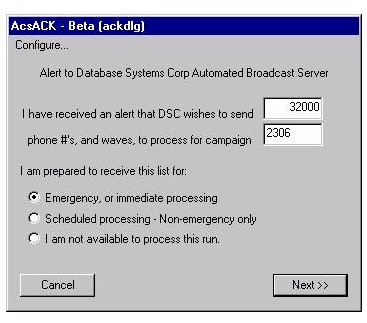
Figure 1
If prepared to process, the user fills in the number of records expected and the campaign and selects either an Emergency or Non-emergency response (as indicated in the ftp document,) clicks “Next >>,” and is taken then to an upload resolution screen (Figure 3.) If not prepared, the user is taken the final screen (Figure 8 – skip to Screen 8.)
Screen 2
The user now sits at the second screen (Figure 2-a or 2-b, depending on the emergency status.) After the upload, the user reviews the files to make sure that the result matches the ftp document, and then indicates the accuracy and readiness to proceed. If there was a problem with the upload, the user may request a retry, in which case Screen 2 will reappear, or decline processing and proceed to Screen 8.
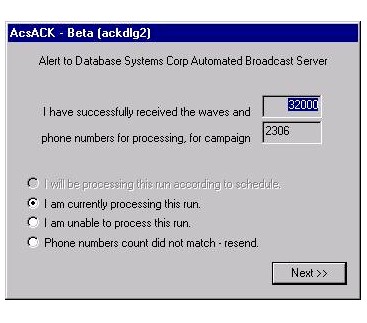
Figure 2-a
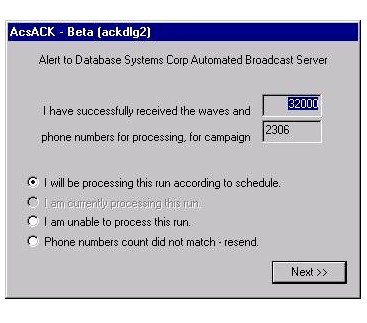
Figure 2-b
If all is OK for continuing, and depending on whether it is and emergency run or not, the user will be taken to Screen 3 (non-emergency) or Screen 4 to indicate the final success / failure status of the run.
Screen 3
This screen (Figure 3) appearing only on non-emergency runs, gives the opportunity to opt-out of the processing for whatever internal reason (go to Screen 8), or remains on the user’s desktop until run processing begins. If continuing, then the user will be taken to Screen 4, to indicate the final success / failure status of the run.
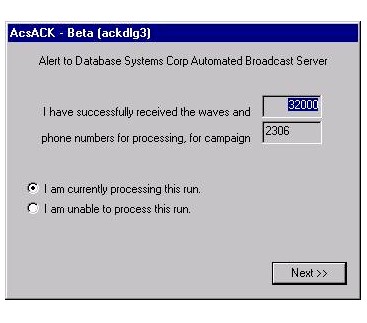
Figure 3
Screen 4
The user sits at this screen until the end of the run. Following the run, the user now has four options for this screen.
- “Run has successfully completed, sending report immediately” (Figure 4-a).
Using the “Browse…” button, the user searches for the run status report, which has been placed in a directory accessible by the client machine. For this option, the user is taken to the final resolution screen (Screen 8.)
- “Run has successfully completed, may send report later.”
User will be taken to Screen 6, where he is given one more opportunity to upload the report immediately. This option is provided so that the DscACS server can be quickly alerted as to the success of the run while report data is being gathered / moved.
- “There was a problem; I am sending unresolved numbers” (Figure 4-b).
For a partially successful run the user may upload a list of any unresolved phone numbers that require further processing. Will be taken to Screen 6, where is given the opportunity to upload the status of those numbers that have been successfully processed.
- “There was a problem; may send unresolved numbers later.”
User will be taken to Screen 5, where he will be given the opportunity to upload any unresolved phone numbers. (If the entire run was a failure, no phone numbers need be uploaded, and it will be at Screen 5 that this opt-out may be taken.)

Figure 4-a
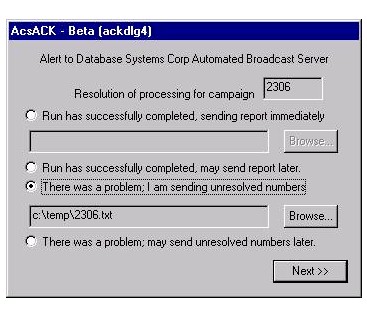
Figure 4-b
Screen 5
User may optionally upload any unresolved phone numbers here (Figure 5.) If the entire run is compromised, or if unable to upload, then the user may indicate so here. User will be taken to Screen 6 for optional report upload.
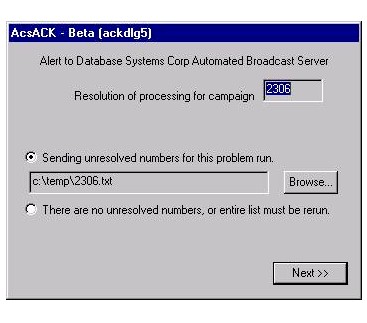
Figure 5
Screen 6
Here is one last opportunity for the user to send a report (Figure 6.) User will be taken to the final screen, Screen 7.

Figure 6
Screen 7
This is the final, farewell screen, which invites the user to follow up with phone or email information regarding the status of this run.
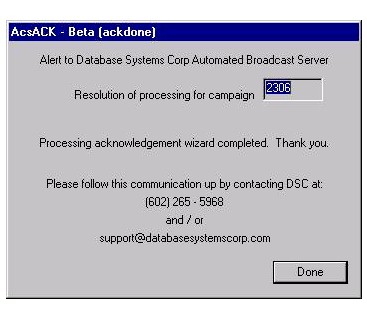
Figure 7
Appendix
In the event that we agree on a naming convention involving sequential numbers, the user will be given the opportunity to enter the beginning number in that series (alternate Screen 1 – Figure 1-A.) All wave files, and their corresponding phone list files, will be named in sequential increments starting with the number indicated here.
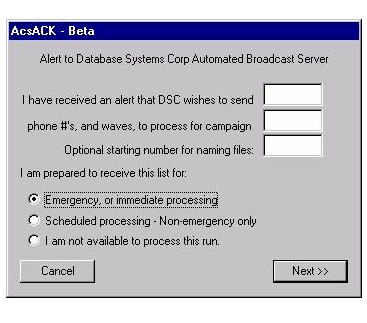
Figure 1-a
ACS API Library Routines
|